[Hero Wars Guide]Titans Brawl Recommended Teams: fix Sylva
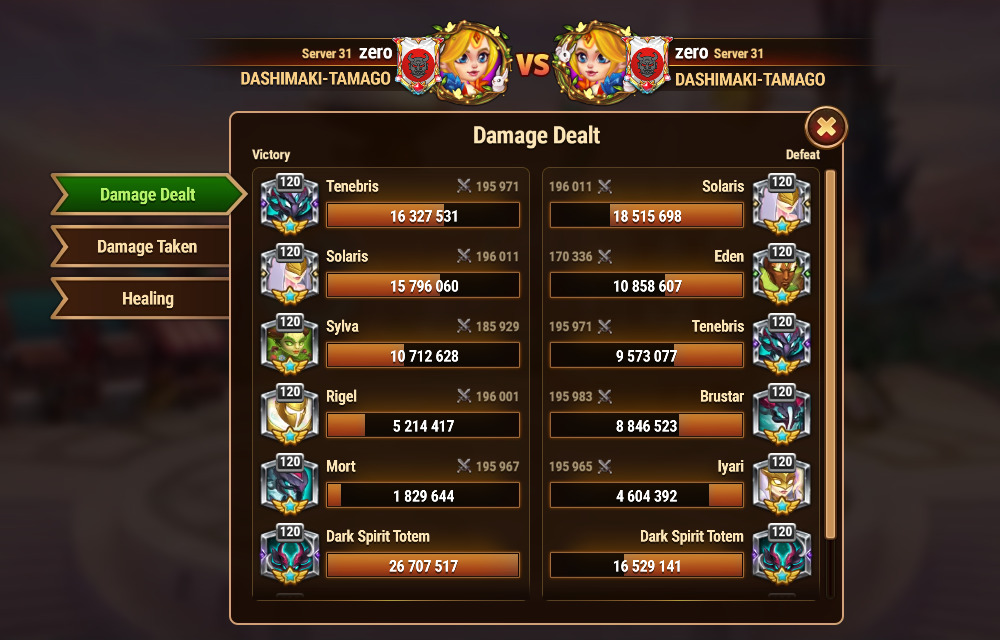
- Brawl Playing Patterns and Recommended Formations
- Method Explanation
- Warning List
- Overview of the Warning List
- List Contents
- Pattern 1: Light 3 (Amon Iyari Solaris) + Dark 2 (Bruster Tenebris)
- Pattern 2: Light 3 (Rigel Iyari Solaris) + Dark 2 (Bruster Tenebris)
- Pattern 3: Light 3 (Rigel Iyari Solaris) + Dark 2 (Mort Tenebris)
- Pattern 4: Light 3 (Rigel Iyari Solaris) + Dark 2 (Keros Tenebris)
- Pattern 5: Dark 3 (Bruster Mort Tenebris) + Light 2 (Rigel Solaris)
- Pattern 6: Dark 3 (Bruster Mort Tenebris) + Light 2 (Iyari Solaris)
- Pattern 7: Dark 3 (Bruster Keros Tenebris) + Light 2 (Rigel Solaris)
- Pattern 8: Dark 3 (Bruster Keros Tenebris) + Light 2 (Iyari Solaris)
- Pattern 9: Dark 3 (Mort Keros Tenebris) + Light 2 (Rigel Solaris)
- Pattern 10: Earth 3 (Avalon Eden Sylva) + Light 2 (Rigel Solaris)
- Pattern 11: Earth 3 (Angus Avalon Eden) + Light 2 (Rigel Solaris)
- Pattern 12: Earth 3 (Angus Avalon Eden) + Light 2 (Iyari Solaris)
- Pattern 13: Earth 3 (Avalon Eden Sylva) + Dark 2 (Bruster Tenebris) *
- Pattern 14: Earth 3 (Angus Avalon Eden) + Dark 2 (Mort Tenebris) *
- Pattern 15: Dark 2 (Bruster Tenebris) + Light 2 (Amon Solaris) + Araji
- Pattern 16: Fire 3 (Moloch Araji Ignis) + Avalon + Hyperion
- Pattern 17: Earth 3 (Angus Avalon Eden) + Dark 2 (Bruster Tenebris)
- Normal List
- Attacking Team (Dark 2 + Light 2)
- Pattern 18: Water 4 + Super *
- Pattern 19: Sigurd Nova Super 3
- Pattern 20: Water 3 (Sigurd Nova Hyperion) + Light 2 (Iyari Solaris)
- Pattern 21: Water 3 (Sigurd Nova Hyperion) + Dark 2 (Bruster Tenebris)
- Pattern 22: Fire 4 + Super
- Pattern 23: Moloch Sylva Super 3
- Pattern 24: Fire 3 (Moloch Araji Ignis) + Light 2 (Iyari Solaris) *
- Pattern 25: Fire 3 (Vulcan Araji Ignis) + Light 2 (Rigel Solaris)
- Pattern 26: Fire 3 (Moloch Araji Ignis) + Dark 2 (Bruster Tenebris)
- Pattern 27: Earth 4 + Super *
- Pattern 28: Angus Silva Super 3 *
- Pattern 29: Angus Avalon Super 3 *
- Pattern 30: Light 4 + Tenebris *
- Pattern 31: Dark 4 + Solaris
- Pattern 32: Dark 2 (Bruster Tenebris) + Light 2 (Rigel Solaris) + Eden *
- Pattern 33: Dark 2 (Bruster Tenebris) + Light 2 (Iyari Solaris) + Eden **
- Pattern 34: Dark 2 (Bruster Tenebris) + Light 2 (Amon Solaris) + Eden
- Pattern 35: Dark 2 (Bruster Tenebris) + Light 2 (Rigel Solaris) + Araji
- Pattern 36: Dark 2 (Bruster Tenebris) + Light 2 (Iyari Solaris) + Araji
- If you want to win without switching teams
- Other Teams
- Play Guide
Brawl Playing Patterns and Recommended Formations
Method Explanation
- When facing an opponent with a combination of Light, Darkness, and Earth totems from the double totems, the matchup is unfavorable. It’s challenging to secure a win unless you consult the list during the battle.
- In other cases, the base team should suffice for victory.
- While there may be some losing scenarios, we anticipate achieving 22 victories with no more than 5 losses.

Verification of Attacking Teams
- The effectiveness of the attacking team is confirmed based on the maximum power observed during combat training.
- We conduct 10 tests involving Eden or Silva. Given that this isn’t a Guild War, we believe this is an adequate number of trials.
Warning List
Overview of the Warning List
Specific responses are needed for the following matchups
- Light 3 Dark 2
- Dark 3 Light 2
- Earth 3 Light 2
- Earth 3 Dark 2
- Intentional irregular teams
List Contents
Note: Not all combinations have been verified, soPatterny be more than thosePattern
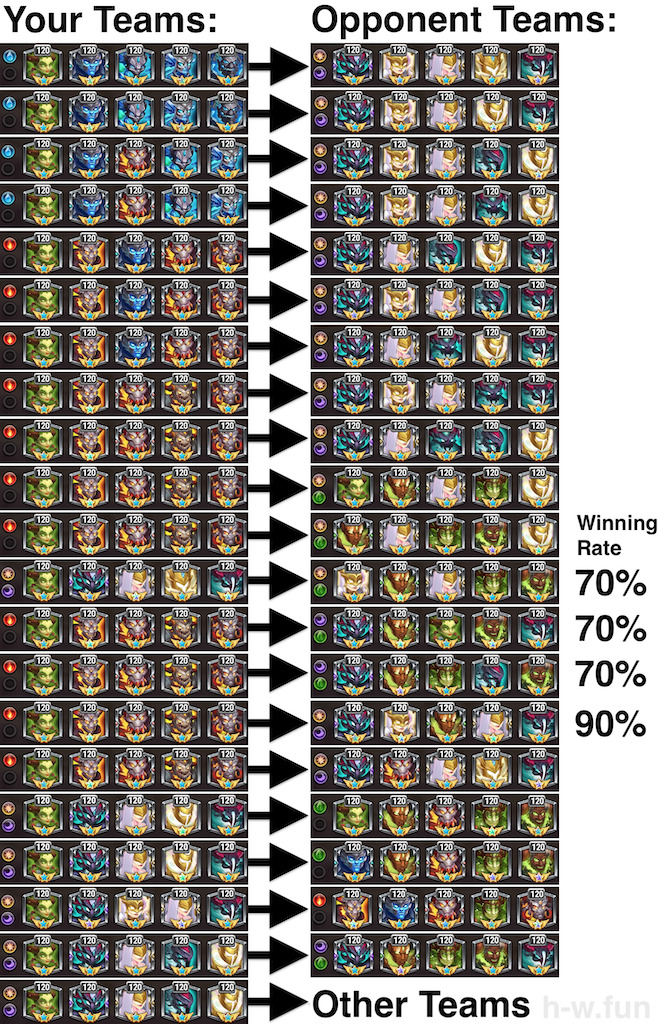
Pattern 1: Light 3 (Amon Iyari Solaris) + Dark 2 (Bruster Tenebris)

Pattern 2: Light 3 (Rigel Iyari Solaris) + Dark 2 (Bruster Tenebris)
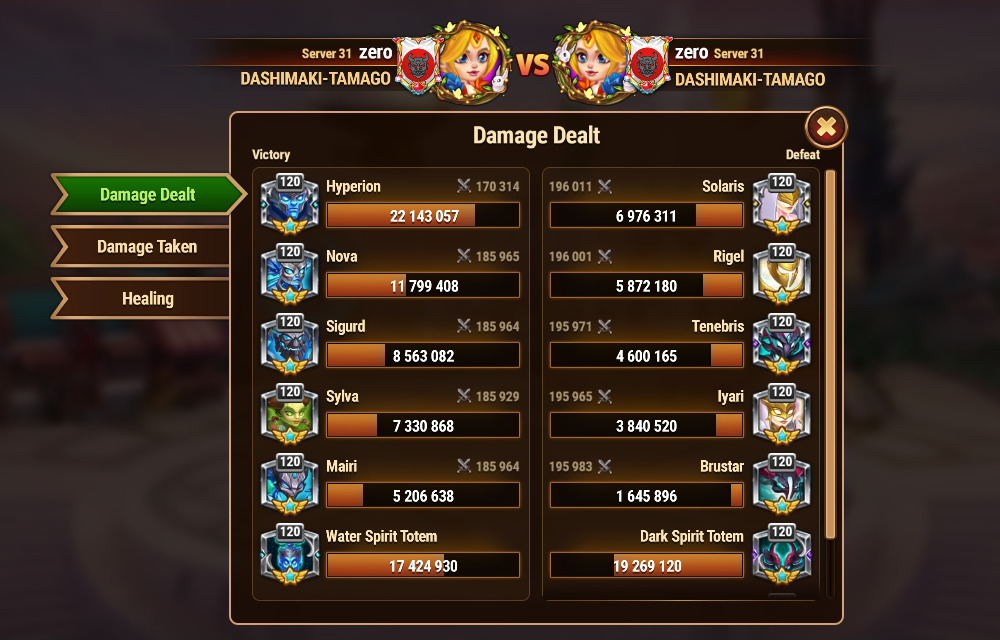
Pattern 3: Light 3 (Rigel Iyari Solaris) + Dark 2 (Mort Tenebris)

Pattern 4: Light 3 (Rigel Iyari Solaris) + Dark 2 (Keros Tenebris)

Pattern 5: Dark 3 (Bruster Mort Tenebris) + Light 2 (Rigel Solaris)
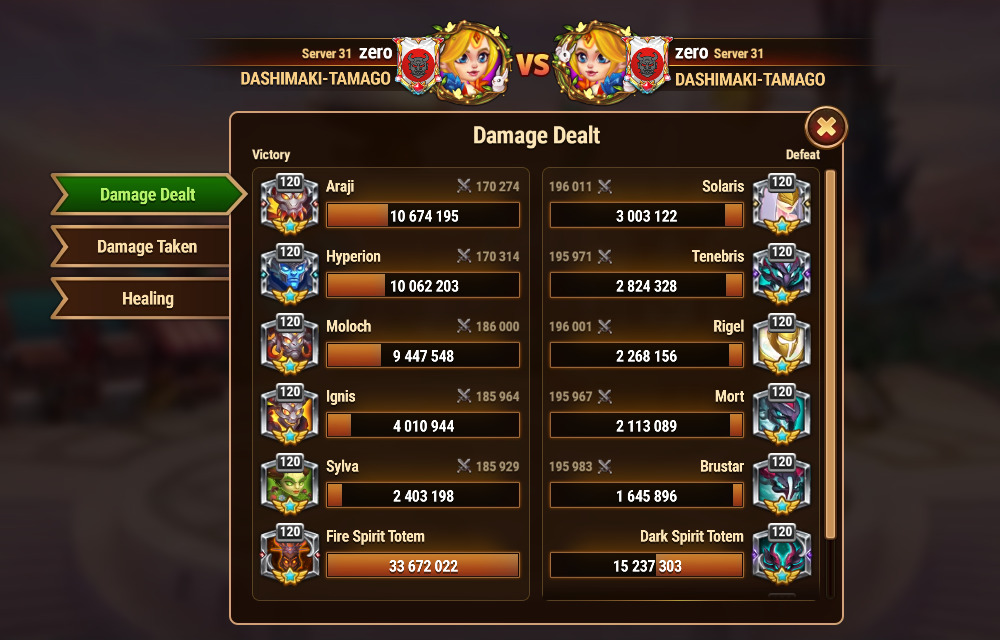
Pattern 6: Dark 3 (Bruster Mort Tenebris) + Light 2 (Iyari Solaris)
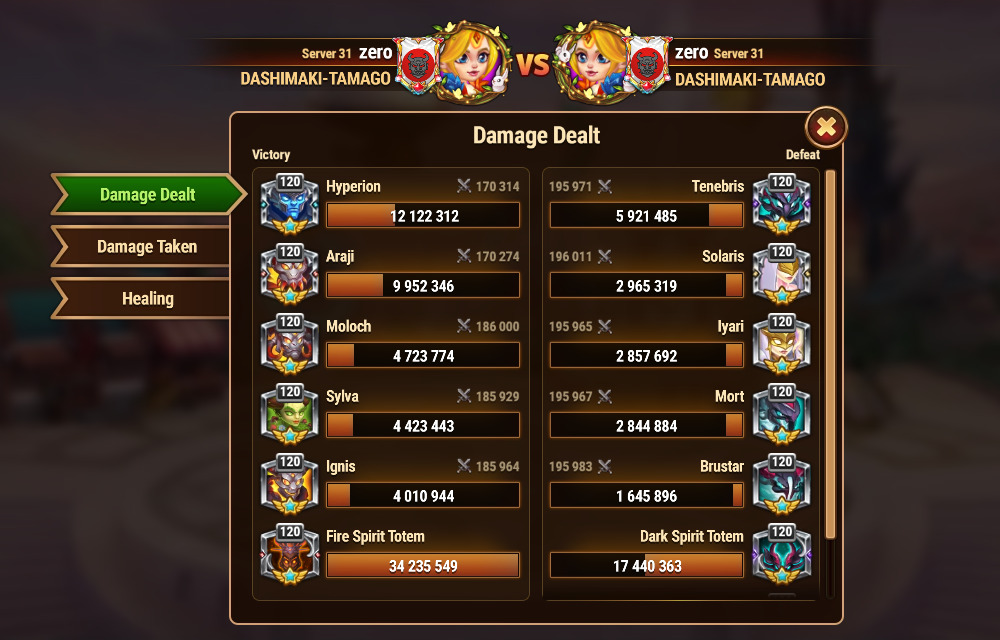
Pattern 7: Dark 3 (Bruster Keros Tenebris) + Light 2 (Rigel Solaris)

Pattern 8: Dark 3 (Bruster Keros Tenebris) + Light 2 (Iyari Solaris)
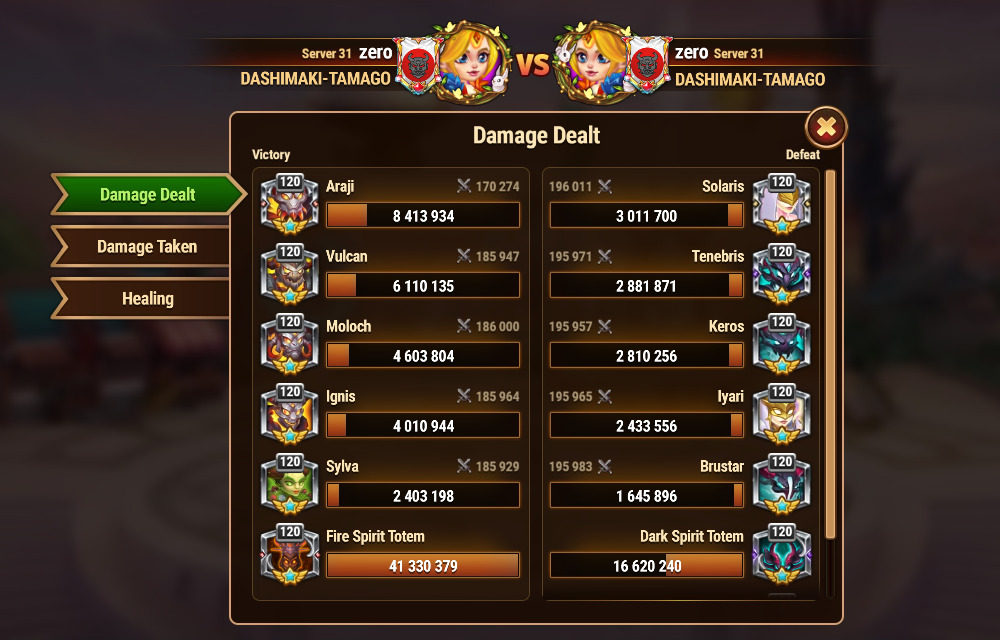
Pattern 9: Dark 3 (Mort Keros Tenebris) + Light 2 (Rigel Solaris)
Fire 4 can win as well.
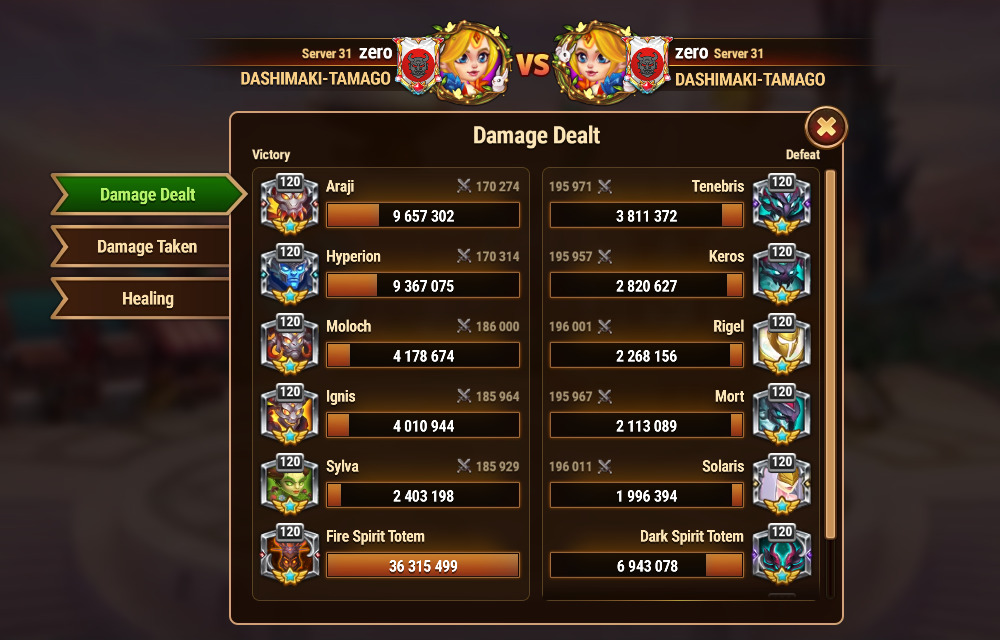
Pattern 10: Earth 3 (Avalon Eden Sylva) + Light 2 (Rigel Solaris)
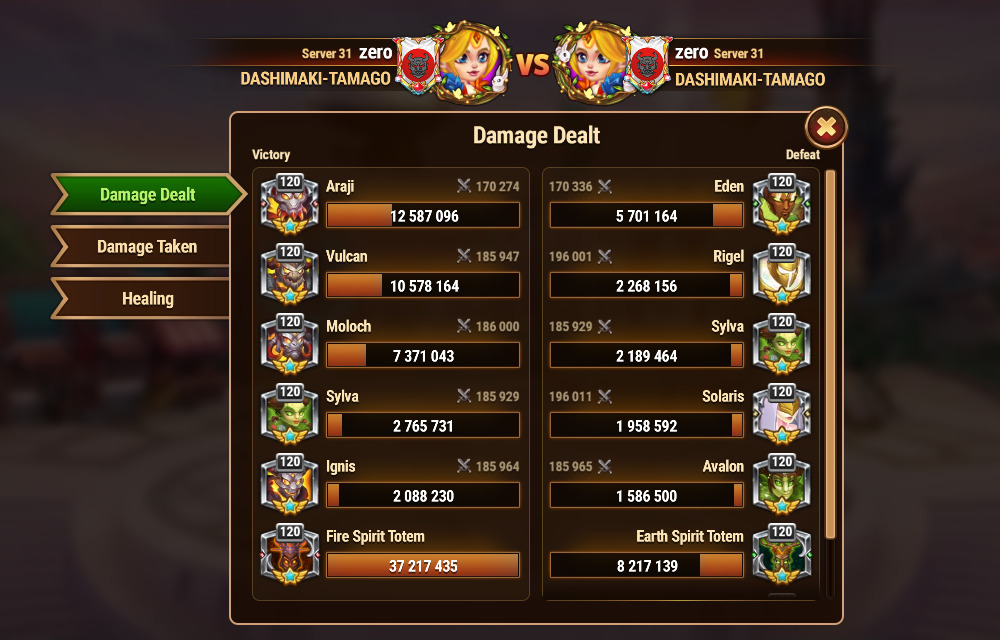
Pattern 11: Earth 3 (Angus Avalon Eden) + Light 2 (Rigel Solaris)
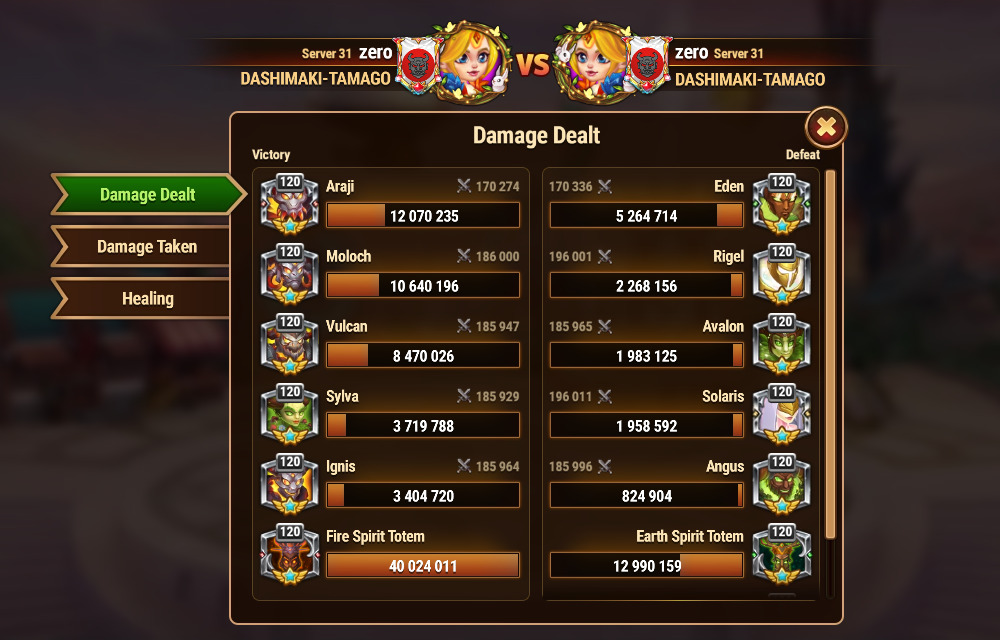
Pattern 12: Earth 3 (Angus Avalon Eden) + Light 2 (Iyari Solaris)
* 7 wins and 3 losses
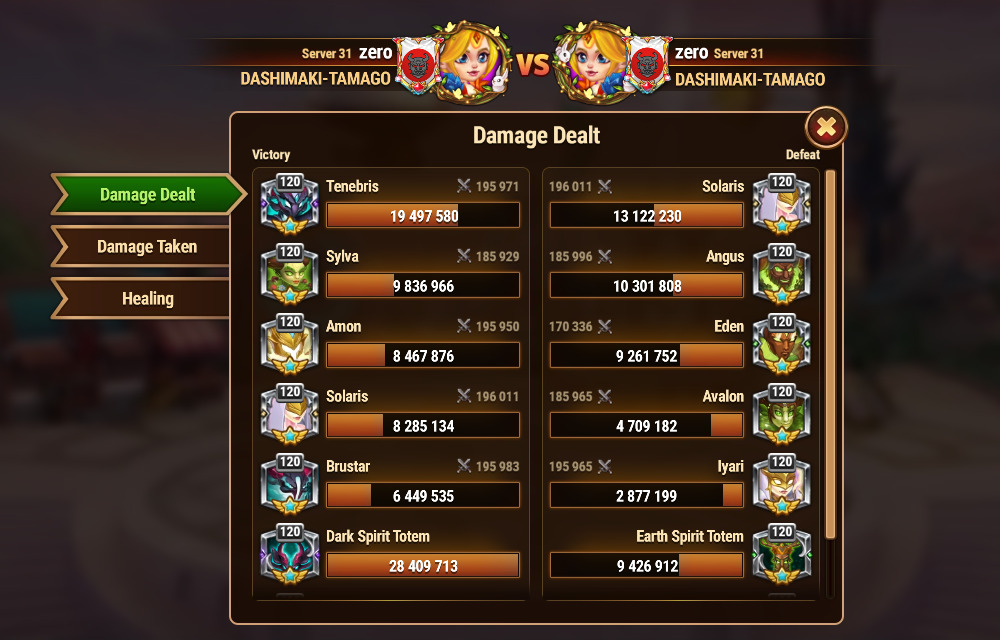
Pattern 13: Earth 3 (Avalon Eden Sylva) + Dark 2 (Bruster Tenebris) *
* 7 wins and 3 losses

Pattern 14: Earth 3 (Angus Avalon Eden) + Dark 2 (Mort Tenebris) *
* 7 wins and 3 losses

Pattern 15: Dark 2 (Bruster Tenebris) + Light 2 (Amon Solaris) + Araji

Pattern 16: Fire 3 (Moloch Araji Ignis) + Avalon + Hyperion
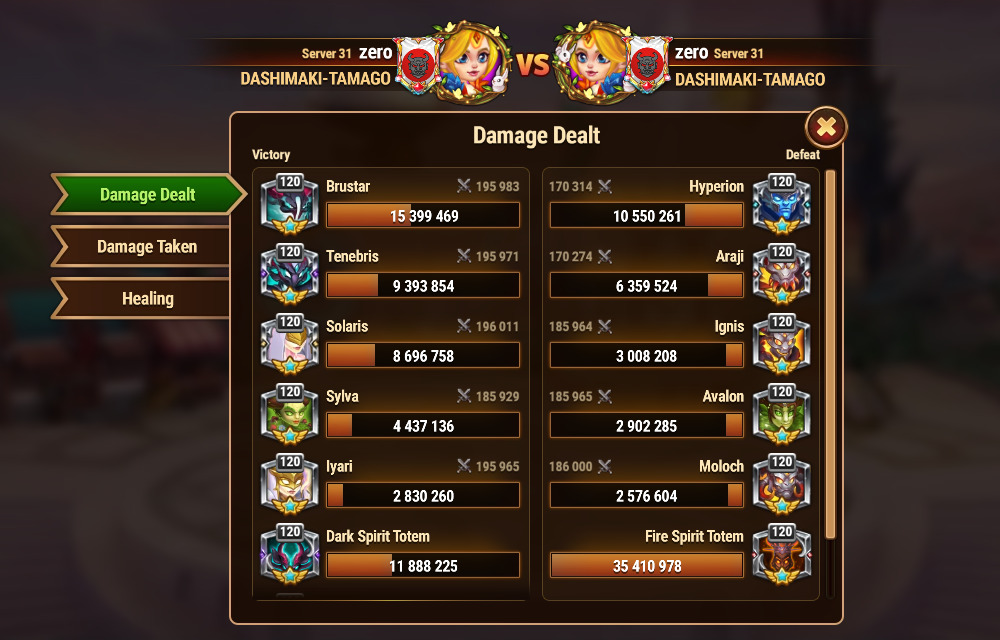
Pattern 17: Earth 3 (Angus Avalon Eden) + Dark 2 (Bruster Tenebris)
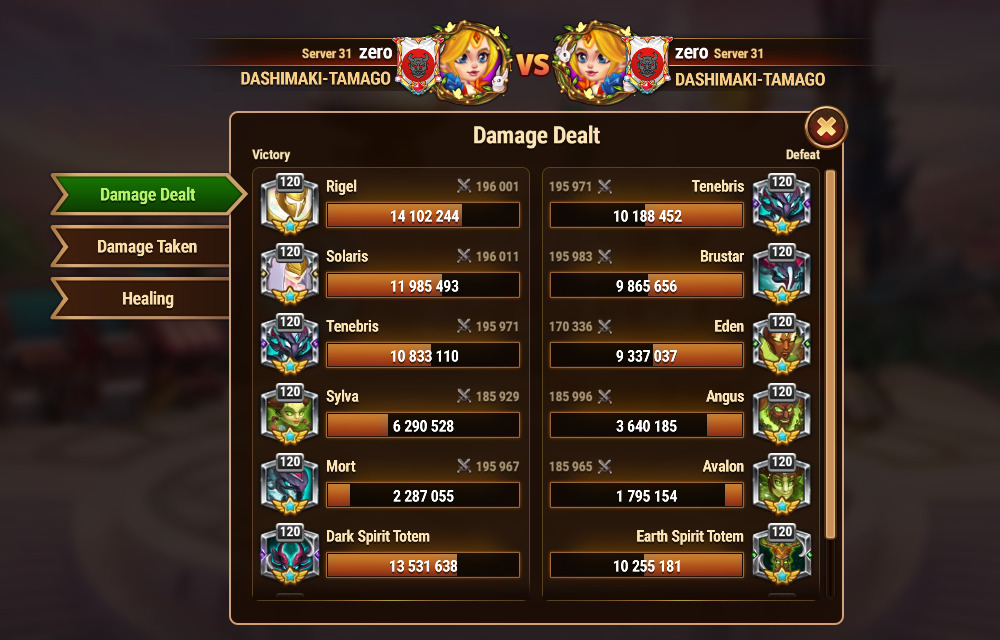
Normal List
Attacking Team (Dark 2 + Light 2)
Sylva + Dark 2 (Keros Tenebris) + Light 2 (Rigel Solaris) *Auto

Pattern 18: Water 4 + Super *
* Water 4 + Araji can lose at a low rate.
* Super can defeat all of Hyperion, Eden, Tenebris, and Solaris.
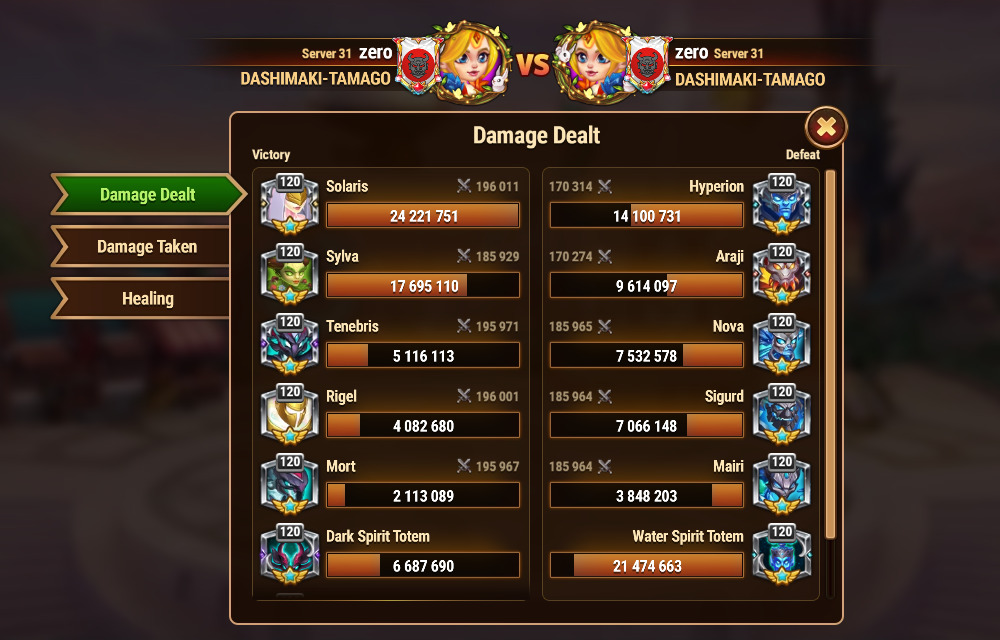
Pattern 19: Sigurd Nova Super 3

Pattern 20: Water 3 (Sigurd Nova Hyperion) + Light 2 (Iyari Solaris)
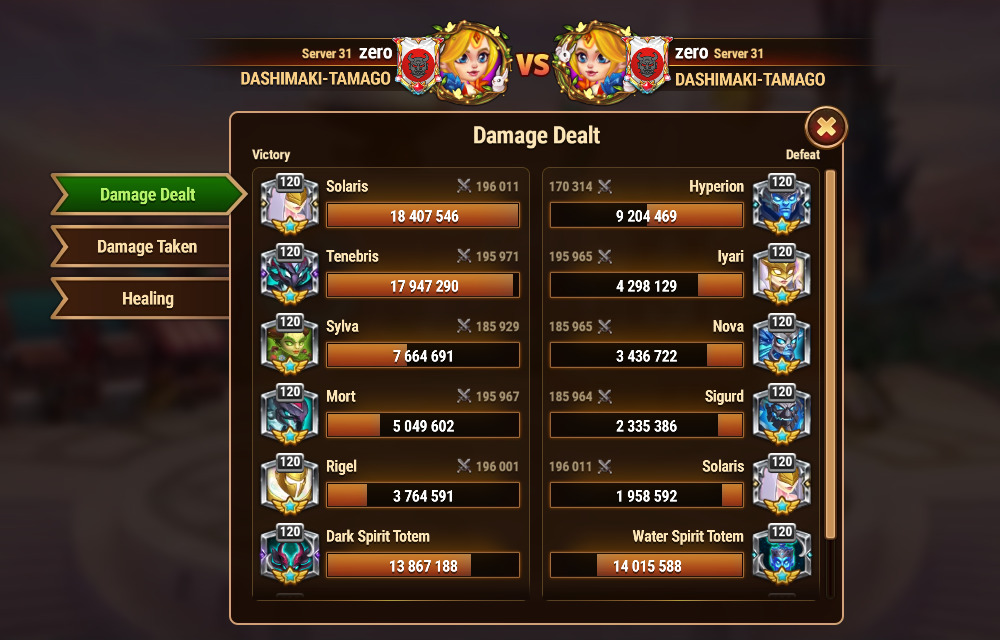
Pattern 21: Water 3 (Sigurd Nova Hyperion) + Dark 2 (Bruster Tenebris)
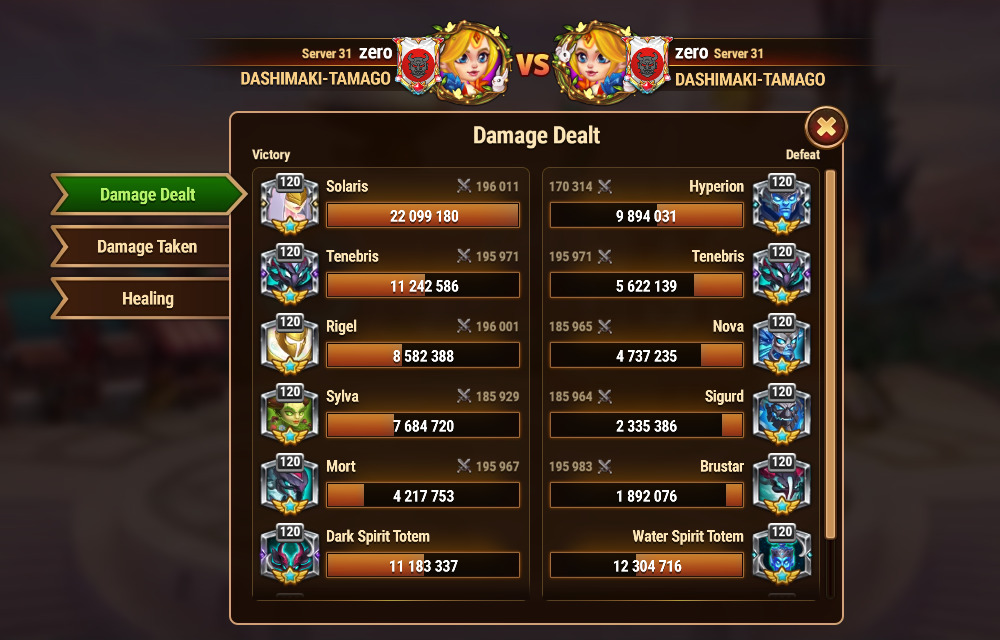
Pattern 22: Fire 4 + Super
* Super can defeat all of Hyperion, Eden, Tenebris, and Solaris.

Pattern 23: Moloch Sylva Super 3
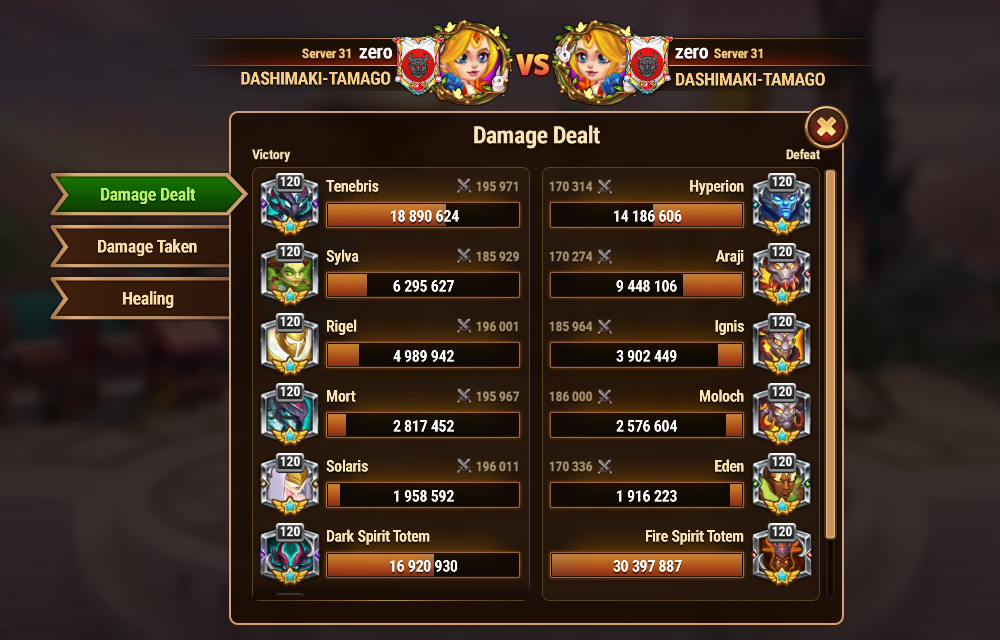
Pattern 24: Fire 3 (Moloch Araji Ignis) + Light 2 (Iyari Solaris) *
* 7 wins and 3 losses

Pattern 25: Fire 3 (Vulcan Araji Ignis) + Light 2 (Rigel Solaris)
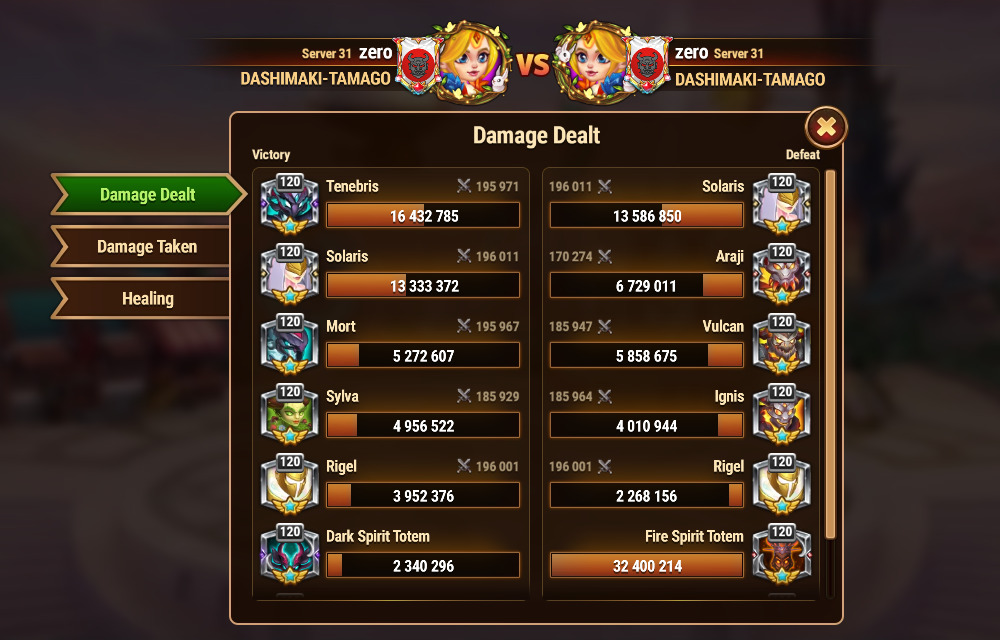
Pattern 26: Fire 3 (Moloch Araji Ignis) + Dark 2 (Bruster Tenebris)

Pattern 27: Earth 4 + Super *
* VS Earth 4 + Araji: 7 wins and 3 losses. 10-0 when changing Mort to Bluster.
* Super can defeat all of Hyperion, Eden, Tenebris, and Solaris.

Pattern 28: Angus Silva Super 3 *
* 9 wins and 1 loss

Pattern 29: Angus Avalon Super 3 *
* 8 wins and 2 losses. 10-0 when changing Mort to Bluster.
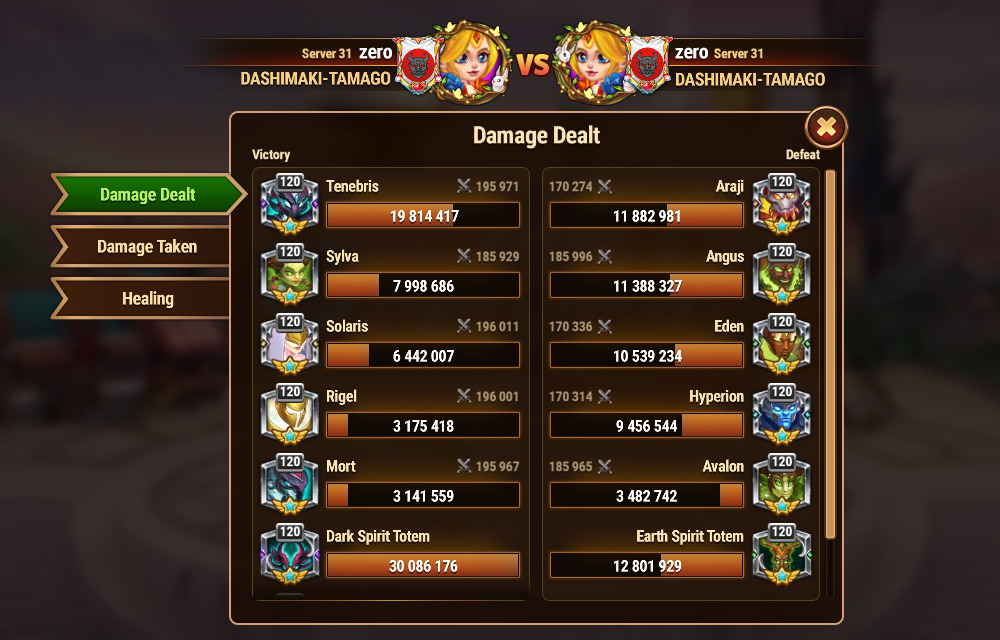
Pattern 30: Light 4 + Tenebris *
* 9 wins and 1 loss
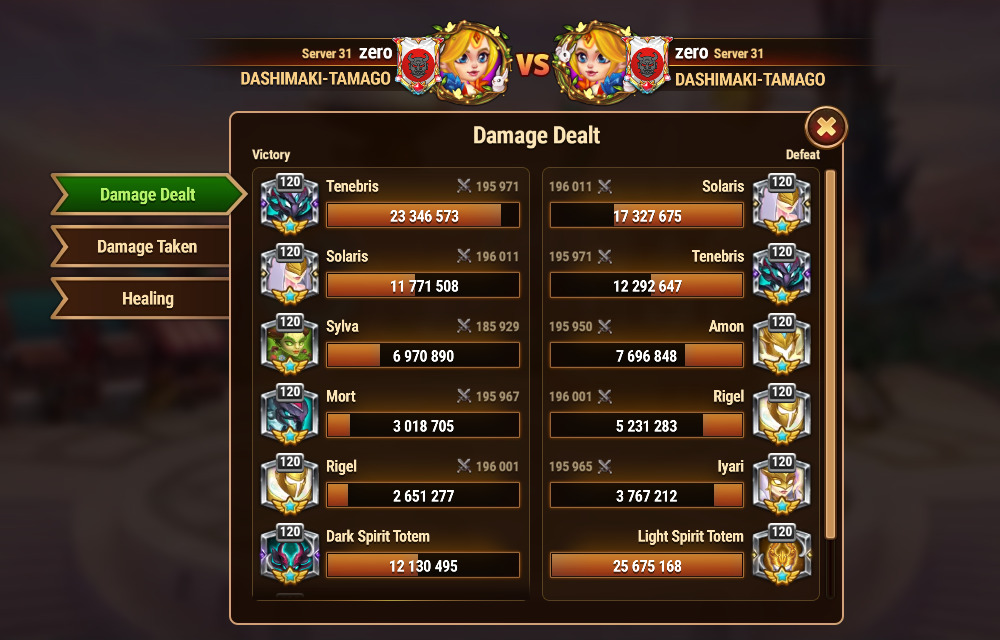
Pattern 31: Dark 4 + Solaris

Pattern 32: Dark 2 (Bruster Tenebris) + Light 2 (Rigel Solaris) + Eden *
* 9 wins and 1 loss
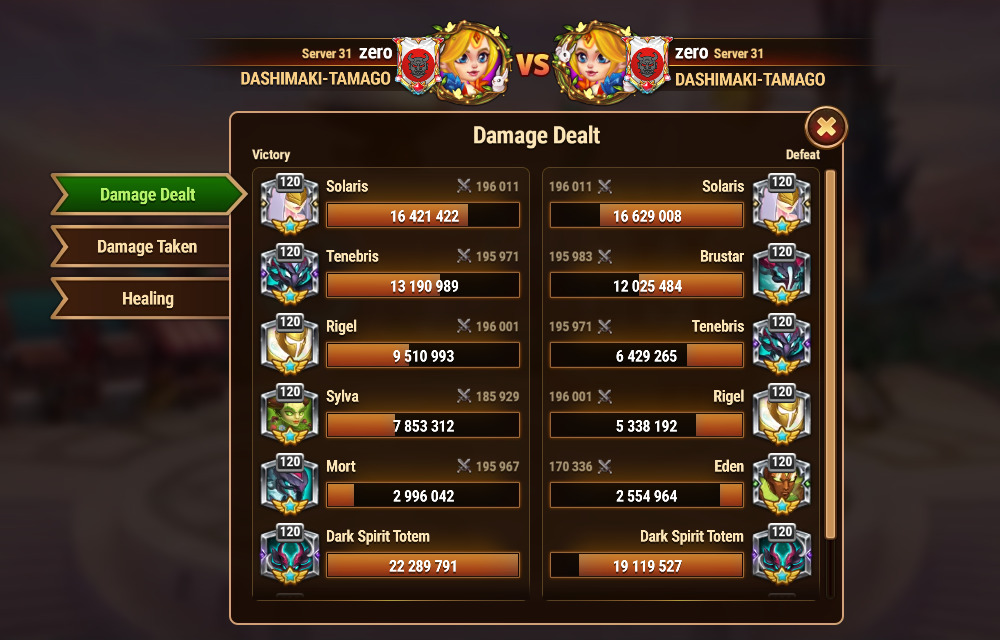
Pattern 33: Dark 2 (Bruster Tenebris) + Light 2 (Iyari Solaris) + Eden **
* 5 wins and 5 losses
* if use Fire 4: 9 wins and 1loss

Pattern 34: Dark 2 (Bruster Tenebris) + Light 2 (Amon Solaris) + Eden

Pattern 35: Dark 2 (Bruster Tenebris) + Light 2 (Rigel Solaris) + Araji
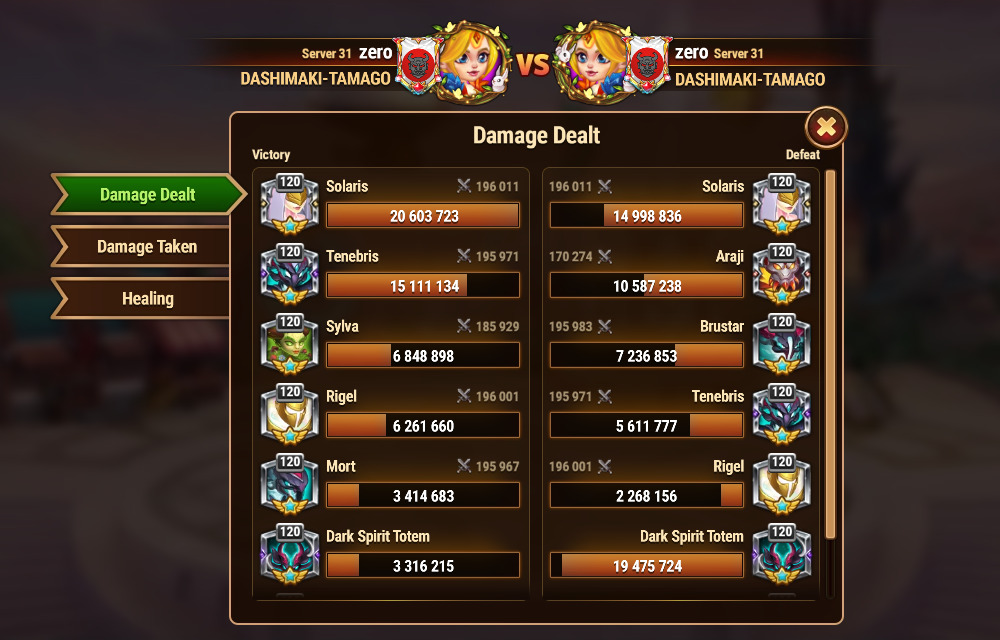
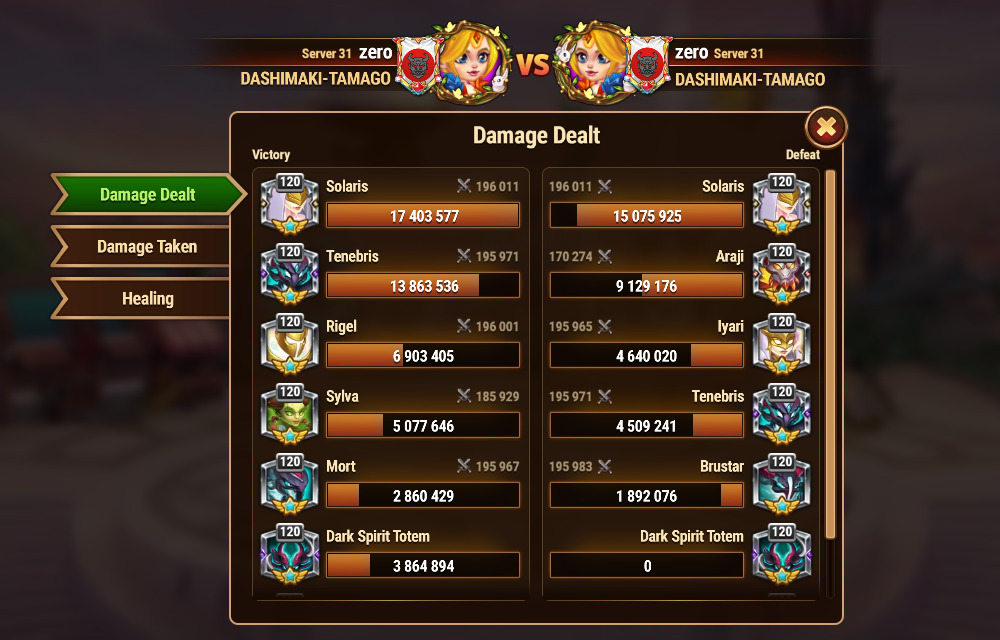
Pattern 36: Dark 2 (Bruster Tenebris) + Light 2 (Iyari Solaris) + Araji
If you want to win without switching teams
it’s recommended to make a fast start before other players fortify their defenses and use the Light/Dark team.

![[Hero Wars Guide] Titans Brawl Teams fix Nova_1](https://h-w.fun/en/wp-content/uploads/sites/2/2023/09/Hero-Wars-Guide-Titans-Brawl-Teams-fix-Nova_1-320x180.jpg)
![[Hero Wars]Titan Brawls and New Skins](https://h-w.fun/en/wp-content/uploads/sites/2/2023/09/Hero-Wars-Guide-Chest-of-Titan-Shooting-New-Skins-320x180.jpg)
![[Hero Wars Guide]Clash of the Titans](https://h-w.fun/en/wp-content/uploads/sites/2/2023/06/Hero-Wars-Guide-Clash-of-the-Titans-320x180.jpg)
![[Hero Wars] Shooting Titan champion skins](https://h-w.fun/en/wp-content/uploads/sites/2/2023/09/Hero-Wars-Shooting-Titan-champion-skins-320x180.jpg)
![[Hero Wars Guide]Brawl Treasure (Clash of the Titans)1](https://h-w.fun/en/wp-content/uploads/sites/2/2023/06/Hero-Wars-GuideBrawl-Treasure-Clash-of-the-Titans1-320x180.jpg)
![[Hero Wars Guide]Titan Skins](https://h-w.fun/en/wp-content/uploads/sites/2/2023/06/Hero-Wars-Guide-Titan-Skins-320x180.jpg)
![[Hero Wars]Rigel Skill](https://h-w.fun/en/wp-content/uploads/sites/2/2023/02/Hero-WarsRigel-Skill-640x360.jpg)
![[Hero Wars Guide] Brustars Champion Skin](https://h-w.fun/en/wp-content/uploads/sites/2/2024/01/Hero-Wars-Guide-Brustars-Champion-Skin-640x360.png)
![[Hero Wars]Nebula Event](https://h-w.fun/en/wp-content/uploads/sites/2/2022/02/Hero-WarsNebula-Event-640x360.jpeg)
![[Hero Wars] Adjust Game Size](https://h-w.fun/en/wp-content/uploads/sites/2/2023/09/Hero-Wars-Adjust-Game-Size-320x180.jpg)
![[Hero Wars]Champions Season All Quests](https://h-w.fun/en/wp-content/uploads/sites/2/2022/05/Hero-WarsChampions-Season-All-Quests-320x180.jpg)
![[Hero Wars Guide]The Great Storm MAP Strategy](https://h-w.fun/en/wp-content/uploads/sites/2/2022/09/Hero-Wars-Guide-The-Great-Storm-MAP-Strategy-320x180.jpg)
![[Hero Wars Guide] Defence Trends Meta Teams](https://h-w.fun/en/wp-content/uploads/sites/2/2023/04/Hero-Wars-Guide-Defence-Trends-Meta-Teams-320x180.png)
![[Hero Wars Guide] Famous Teams for Osh Battle](https://h-w.fun/en/wp-content/uploads/sites/2/2023/12/Hero-Wars-Guide-Famous-Teams-for-Osh-Battle-320x180.png)
![[Hero Wars Guide] Temple Guardians 130](https://h-w.fun/en/wp-content/uploads/sites/2/2024/05/Hero-Wars-Guide-Temple-Guardians-130-320x180.jpg)
![[Hero Wars Guide] Galahads Memories](https://h-w.fun/en/wp-content/uploads/sites/2/2023/12/Hero-Wars-Guide-Galahads-Memories-320x180.jpg)
![[Hero Wars] Cosmic Season](https://h-w.fun/en/wp-content/uploads/sites/2/2021/12/Hero-Wars-Cosmic-Season-320x180.jpg)
![[Hero Wars Guide]Maestro of the Phantom Orchestra](https://h-w.fun/en/wp-content/uploads/sites/2/2024/09/Hero-Wars-Phantom-Orchestra_0-320x180.jpg)
![[Hero Wars] Maestro Boss](https://h-w.fun/en/wp-content/uploads/sites/2/2025/06/Hero-Wars-Maestro-Boss-320x180.jpg)
![[Hero Wars] Aurora vs khark](https://h-w.fun/en/wp-content/uploads/sites/2/2023/04/Hero-Wars-Aurora-vs-khark-320x180.jpg)
![[Hero Wars] Interplanetary Travel](https://h-w.fun/en/wp-content/uploads/sites/2/2023/11/Hero-Wars-Interplanetary-Travel-320x180.jpg)